Every blog or website owner should have Google Analytics. Especially if you are interested in online marketing. In this guide, we will explain how to install it on your website or blog.
Benefits of Google Analytics
How to install Google Analytics and why every blogger and business card owner should have this tool? Because it's one of the best free tools that analyzes all the important statistics about a website. This is a great support if you are implementing broadly defined online marketing into your blog strategy. It is worth connecting GA to your website. It provides a lot of nice features and is completely free.
By installing Analytics on your website, you can, for example
- check how many people visit the site and how long they stay on it (session duration)
- look at where readers are coming from - search engine traffic (organic), links (referrals), or perhaps social media?
- Determine the type of devices your visitors use to view your site (are more people using a computer or perhaps a smartphone?),
- find out which posts are popular and how many people read them,
- check which days and times your blog/page is most popular.
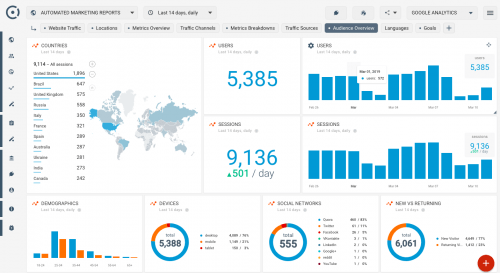
The program also allows you to see which posts or subpages have the highest bounce rate. This, in turn, can indicate what scares readers away and which places on the page should be improved in terms of content, appearance, or action. All important statistics are presented in the tool as reports. Access to them is very simple - these are tabs in the menu bar. Information is presented in the form of tables, graphs, and charts. The amount of data presented can be changed, for example, by selecting a specific period (last 7 days, 30 days, etc.).
This is just a fragment of what GA can do. For this reason, it is definitely worth placing this tool on your website or blog and using it to improve the functioning of the page. In addition to a guide on how to install Google Analytics, the site also describes the features of the program. You can learn all the features by watching the presentation:https://support.google.com/analytics/answer/9021164?hl=pl&ref_topic=3544906.

How do I install Google Analytics on my website?
There are several ways to install the tool, but we want to focus on the simplest ones.
These methods are:
- manually load the tracking code into the code of the page you want to analyze,
- uploading the tracking code to the website using a plugin,
- Install Analytics using Google Tag Manager.
In any case, you must first have a Google account and secondly, you must have administrative access to your blog or website. In method number two, you must install the corresponding plugin in the Chrome browser (you must have this browser). In the third method, you need to download and paste the so-called Google Analytics Code or Tracking Code. Don't worry - you don't need to be a programmer or IT specialist to successfully connect your website to GA. It's really not difficult. We will show you how to install Google Analytics in the following steps.
Method 1: Enter the tracking code manually
This is our favorite method of adding a website to GA. It consists in downloading the tracking code from your GA account and pasting it into the HEAD section of the website code that you want to track. Unlike the external method, this is a very fast and easy one. We will divide the instructions into two parts to make it more readable. First, we will download the tracking code, and in the second part, we will paste it into a WordPress-based website or blog.
How do I get the Google Analytics tracking code?
You sign in to Google Analytics with your Google account information.
You register your blog/site:
- Administration (gear icon in the lower left corner)
- Create a service
- Select Network / Site Rating
- You fill in all the fields
- Confirm by clicking the blue Create button.
The tracking ID (number) is also displayed in the white field below the global site tag, i.e. the tracking code.
We are going to copy this code from the white space in its entirety. We will paste it into WordPress.

How do I insert a tracking code on a page?
- Log in to the WordPress site.
- In the menu, select Appearance, then click Editor.
- A window will appear with the code and something like a table of contents for the various sections on the right. In this list, we look for header.php and click it.
- We find the tag and just below it, we directly paste this previously copied code.
- Go down and click on the blue Update File button.
Method 2. How to install Google Analytics with a WordPress plugin
This method is intended only for people who have this domain set up on WordPress (WP). The system makes it easy to work with different types of plugins. GA installation can also be done using this method. Many plugins are used for this purpose. To find them, just enter the word Analytics from the plugin search engine in the appropriate section of WordPress.
We will name a few names to find them:
- Analyze the Google Analytics for WP dashboard,
- MonsterInsights,
- GA Google Analytics,
- ExactMetrics.
To do this, we will show you how to install Google Analytics using the MonsterInsights plugin. To do this, of course, you need to prepare the tracking code in advance according to the instructions in method 1.
Then follow the steps below:
- Log in to your WP dashboard and select Plugins and Add New in the left menu.
- In the plugin search engine, enter the phrase MonsterInsights. The first plugin that appears is the one we are interested in.
- Click Install Now and activate.
- We're now on a page where you'll need to mark a few things. We designate the type of page: Business Website / Publisher (Blog) / E-commerce and click Save and Continue. Select Connect MonsterInsights and connect the plugin to our Google account to connect GA. We welcome, select a site to monitor (if you have more than one in your Google account) and complete the installation by clicking the blue Full Connection button. By clicking the next few buttons, we return to the WordPress administration panel.
- Within 24 hours after installing the plugin, we should start viewing data from Analytics directly in WP, on the "Statistics" tab on the left of the menu.

Method 3: Use Google Tag Manager (GTM)
The product is called Google Tag Manageris used to implement various types of marketing codes on the page we want to track. It is a program that allows you to insert these codes with just one tool, without the use of a site administrator or other programmer. It just makes such technical issues easier. It is also useful if you want to connect a page to GA.
The hardest part is just getting started with Tag Manager. It must be installed according to the instructions, which include the need to paste Google Tag Manager codes on each page of the site. If you are completely unfamiliar with the codes, just ask the developer or site administrator to do it. Only after the tool is installed correctly, proceed to adding GA.
How do I install Google Analytics with Google Tag Manager?
- You log in to your GA account and upload the tracking code in the same way as in method 1.
- You are logged into your Google Tag Manager account.
- There are several tabs in the left menu. Go to the Tags tab and click Create.
- You name the tag and click on the white box called Tag Configuration.
- Then GTM immediately shows you the tag hint, including GA. There are three types, but you're only interested in Google Analytics - Universal Analytics (general tracking tag). To zoom in.
- Select Tracking type - Page display.
- See Setting up Google Analytics below. Click Choose a customization variable - New variable.
- A window appears where you need to insert the tracking ID. Click Paste approve.
- Click the Rules tab below and select All Pages. Then click the blue Save button.
- Voila! Tag added.
As you can see, there are several ways to install Google Analytics on your website. Of course, it's easier for people who have already dealt with WordPress and other Google tools. After adding the tool, you should focus on familiarizing yourself with its functions and learning how to use them to your advantage.


